


Old Install Guides
VNC, sound and phone-storage instructions for distros installed before Andronix 2.0 and for the Classic Modded OS editions.
These instructions are for distros installed before Andronix 2.0, and for the Classic Modded OS editions. They use the old scripts, log you in as root, and need some manual setup that Andronix 2.0 now does for you. For a current install, see VNC, Sound and Phone storage.
VNC on an old install
On an old install, vncserver-start asks for a resolution, and vncserver-stop asks for a port number: enter 1 and press Enter.
Setting a resolution on an old install
To set your preferred resolution, open the VNC start script by running:
nano /usr/local/bin/vncserver-startThen change the last line of the file to:
vncserver -name remote-desktop -geometry 1920x1080 :1Save the file by pressing ctrl + x, then y, and finally Enter.
How to change resolution permanently in Modded OS /Ubuntu 19
To change the resolution permanently, run the following command in the distro's shell:
nano /usr/local/bin/vncThen replace the second line with:
LD_PRELOAD=/lib/aarch64-linux-gnu/libgcc_s.so.1 vncserver -localhost no -depth 24 -name remote-desktop -geometry 1920x1080 :$PORTWhen you're done, press Ctrl+X, type Y and press Enter. The next time you start the VNC server, choose the first option, Start vnc-server with autodetect/dynamic resolution.
VNC on other devices (old install)
First, make sure both devices are on the same network. If you don't have access to Wi-Fi, turn on the hotspot on the device running Linux and connect the other device to it. Once both devices are on the same network, run the following command inside the distro's shell:
nano /usr/local/bin/vncserver-startNow change the last line to:
vncserver -name remote-desktop -geometry 1920x1080 -localhost no :1vncserver -name remote-desktop -geometry 1920x1080 -localhost :1When you're done, open a new Termux session (swipe in from the left edge to open the sidebar for more options) and type:
ip aCopy the WLAN IP address (e.g. 192.168.xx.xx). On the other device, connect to this IP address with port number 1 (e.g. 192.168.xx.xx:1).
Sound on an old install
Follow these steps in order to enable sound output:
Close Distro
If your distro is running, close it by running exit inside Termux. Skip this step if your distro isn't running.
exitRun Commands
Run the following command in Termux (not inside Linux):
pkg install wget && wget https://andronixos.sfo2.cdn.digitaloceanspaces.com/OS-Files/setup-audio.sh && chmod +x setup-audio.sh && ./setup-audio.shStorage on an old install
Termux Session
First, open a new Termux session (swipe from the left edge to the right) and type:
termux-setup-storageTermux will now ask for Storage permission. Allow the Storage permission.
Open Start File
Once that's done, type:
nano start-(distroname).sh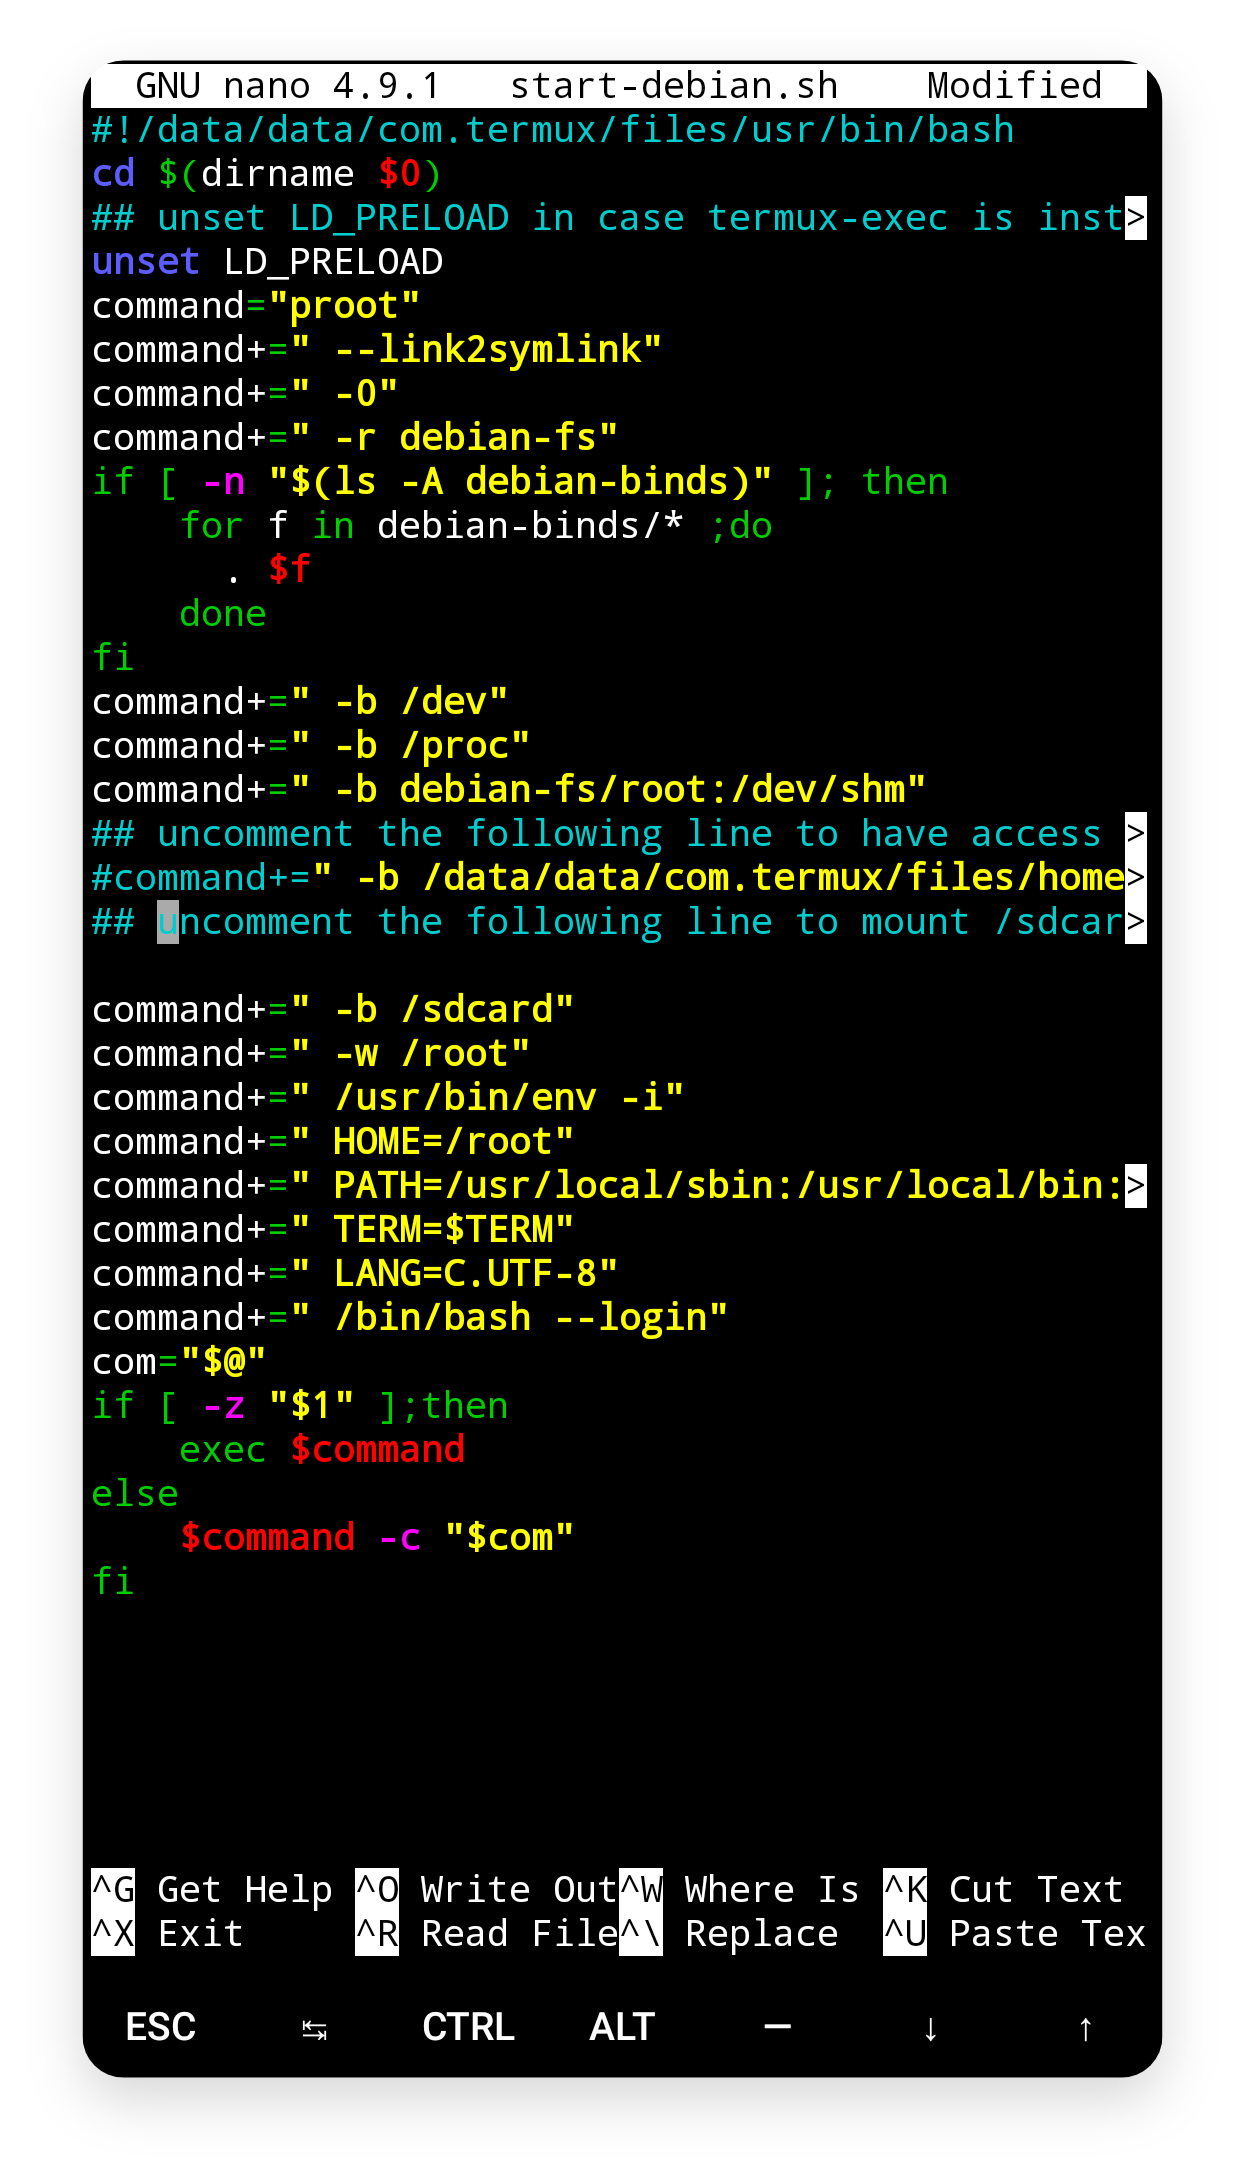
Save
When you're done, press Ctrl+X, then Y, and then Enter. Now start your Linux system and run cd /. You should see a folder named sdcard, which means you have successfully mounted your internal storage.
Related pages
- Installs from before Andronix 2.0: find, keep or remove an old install.
- Install with the app: install the Andronix 2.0 version.